Metrics Dashboards
Dashboards (under Analyze > Dashboards) aggregate data from your tests and batches across time, so you can see how your system, tests, or test suite are performing as a whole — not just within a single batch. If you've used Grafana, the mental model is the same: a dashboard is a named, refreshable view that pins a set of metric charts to a branch and a time window.
Dashboards are scoped to a single branch (typically main) and refreshed on demand, or automatically, to pull in newly completed batches.
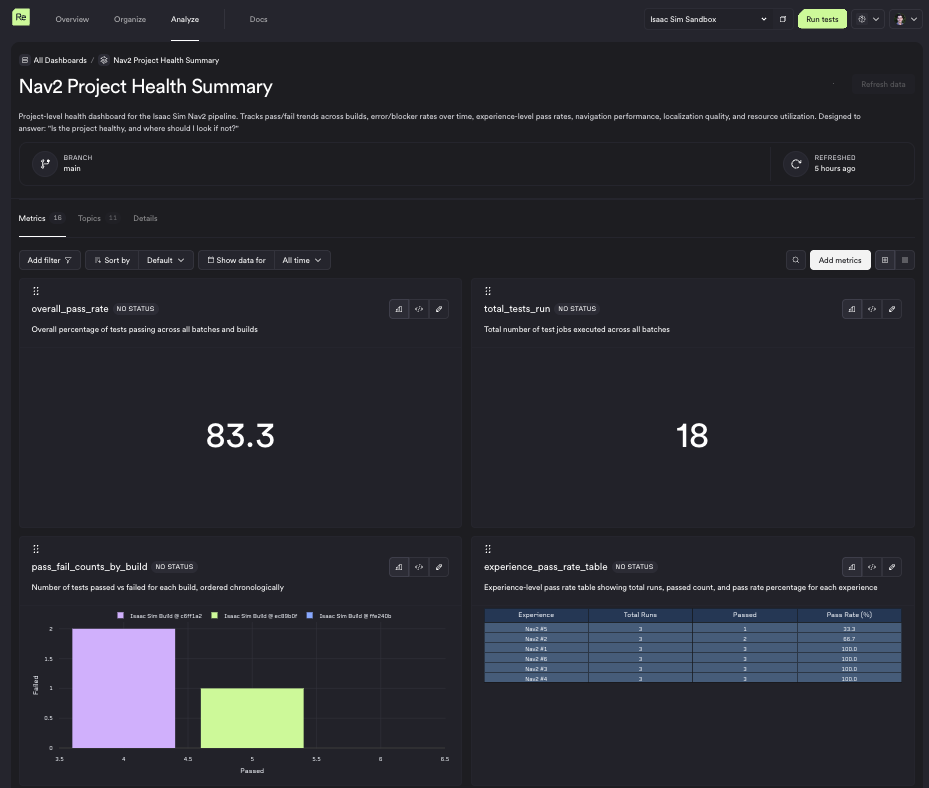
What can I answer with a dashboard?
A dashboard is useful any time the question spans more than one batch. Some examples:
- Pass rate trend — what percentage of tests have passed over the last 30 days, broken down by day?
- Build health — how does the failure rate of build N compare to build N−1?
- Flaky experiences — which experiences have the highest failure rate across the last week of runs?
- Coverage — how many distinct experiences has my test suite executed against in the last month?
- Regression watch — has the average value of a key performance metric (e.g. localization error, latency) drifted over time?
The common thread: the result needs data from multiple batches to be meaningful.
Topics
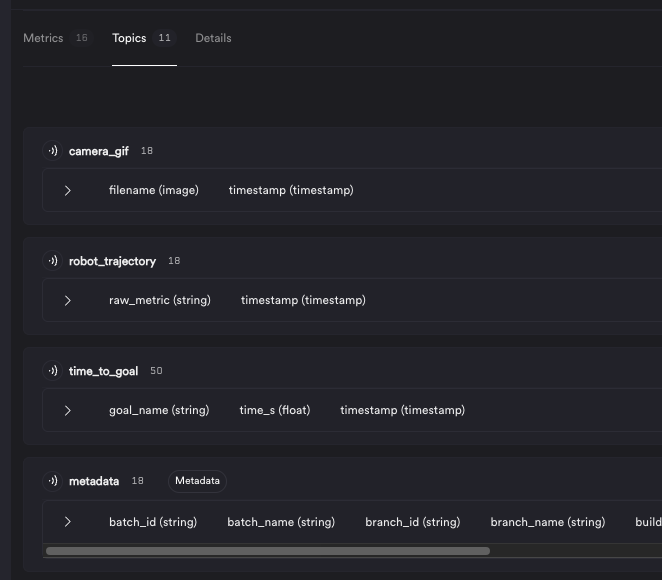
Dashboards are powered by the same SQL queries as regular metrics, but the scope of the query is wider — you're now looking at every job that ran on the branch within the dashboard's day range, not a single batch. Under the Topics tab you'll see all your data from tests along with the usual special topics:
metadata: general info about the test such as the time it ran, the experience and build it ran with, its status, and morecontainer_performance: the CPU and memory usage of each container, from each testtest_length_seconds: how long each test took
The entry point for many dashboard queries is the metadata topic as it will allow you to do things such as:
- for each build of my system, what percentage of tests passed?
- which experiences fail the most often?
- over time, has my Nightly Regression test suite gotten slower, or faster?
See the metadata schema in the main metrics guide for the full column reference.
You will see these topics under the Topics tab, alongside data emitted from your tests:
How to create Dashboards
There are three ways to create a dashboard. They're complementary — most users start with the first, graduate to the second once their dashboards stabilise, and reach for the third when they want a dashboard's full lifecycle (create, update, and metrics) managed entirely by the config file.
From the webapp
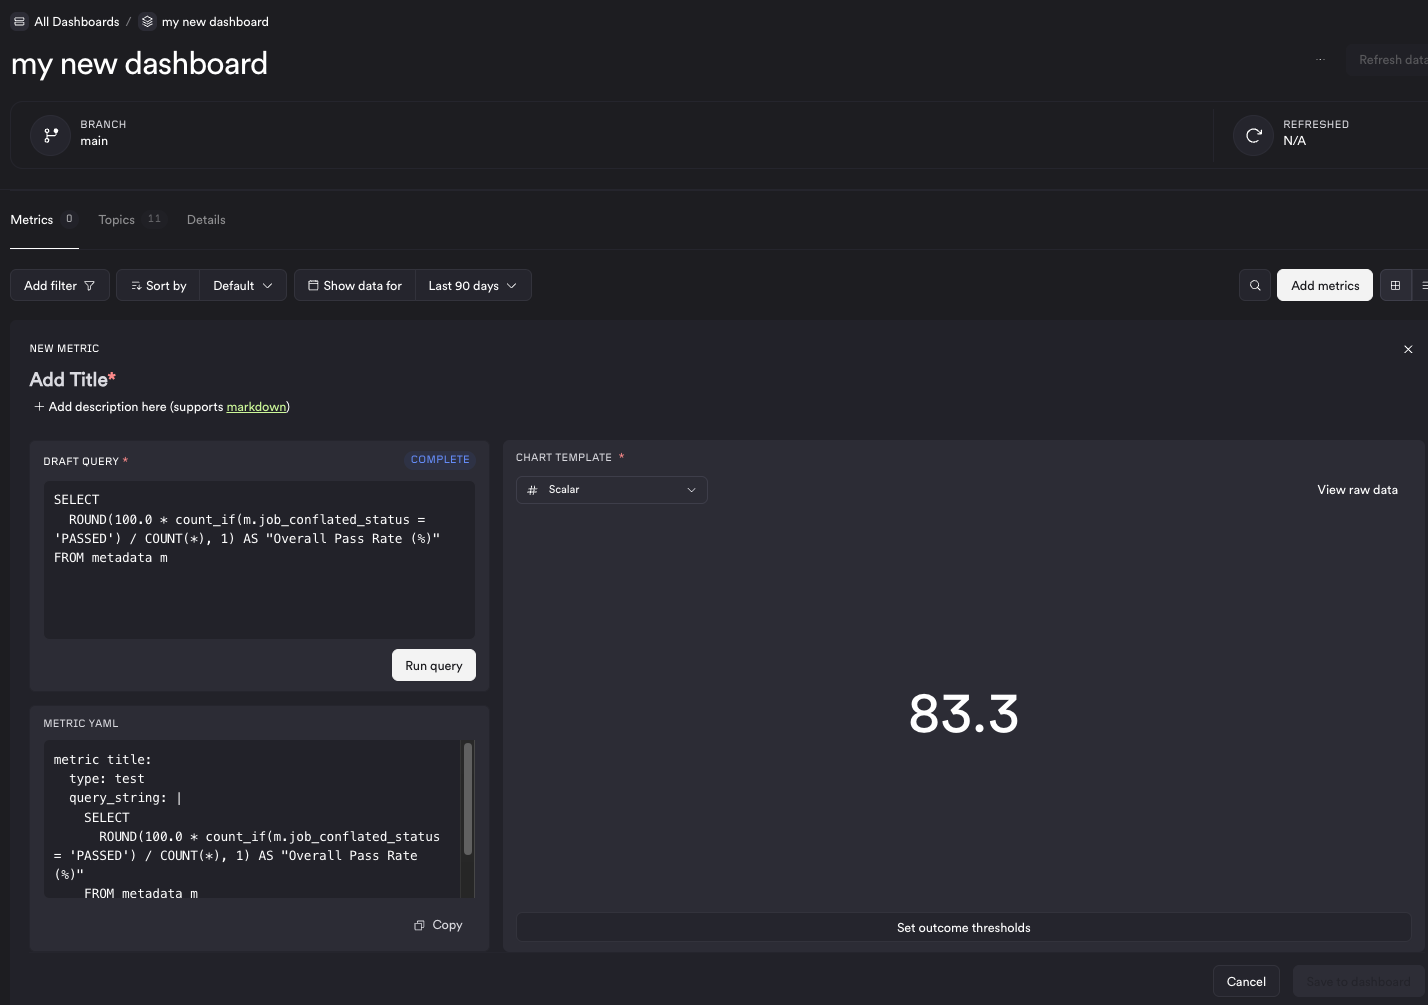
The fastest path is to explore your data in the app. Navigate to Analyze > Dashboards, create a new dashboard scoped to a branch, and add metrics directly from the UI. Choosing a metrics set from your metrics config file is optional — you can start from scratch. You can browse the Topics tab to see what data is available, write queries against it, and iterate on charts until they look right. This is the best workflow when you're still figuring out what questions you want to answer.
CLI-created, still editable
Once a dashboard is doing useful work, you'll typically want to source-control its metrics. Define the metrics in your .resim/metrics/config.resim.yaml file, group them into a metrics set, and create the dashboard once via the SignalFlag CLI. Export the config for an existing dashboard created in the UI as an easy starting point for creating a metrics set.
resim dashboards create \
    --project "my project" \
    --name "Dashboard" \
    --branch main \
    --metrics-set "my dashboard" \
    --day-range 90
From then on, edits to the config flow into the dashboard via resim metrics sync. To pick up the changes, open the dashboard in the app and click Refresh data — no need to recreate it. The dashboard itself is still a regular, editable dashboard in the app — you created it once from the CLI, but nothing stops you from renaming it, changing its refresh mode, or adding ad-hoc charts on top afterward.
Declarative, fully config-owned
If you'd rather not run a CLI command at all, define the dashboard directly under a top-level dashboards: section in your config file. It's created automatically the next time you run resim metrics sync — and kept in sync on every subsequent sync, for as long as it stays in the config:
dashboards:
  Branch Health:
    metrics_set: Branch Health
    description: Rolling health snapshot for this branch.
    refresh: manual
    day_range: 90
Each key under dashboards: is a dashboard name, and metrics_set must reference an existing entry under metrics sets: (see the Branch Health example below). description, refresh (manual or auto, default manual), day_range, and metadata_filters (see Filtering a dashboard by metadata below) are all optional.
A config-owned dashboard behaves differently from the other two paths in a few important ways:
- It's read-only in the app. You'll see a
CONFIG DRIVENbadge, and Edit and the refresh-mode toggle are greyed out with a tooltip explaining why. Refresh data still works — it pulls fresh data using the config version that was last synced, not a live read of the file, so if you've since edited the config, sync again first. - Deleting it only sticks in one direction. Removing a dashboard's entry from
dashboards:and syncing does not delete it in the app — the dashboard is left as-is, so delete it manually in the app if you no longer want it. Conversely, deleting it in the app while it's still defined indashboards:doesn't stick — the next sync re-creates it (the delete confirmation warns you about this). - Names must be unique per branch. This applies across config-owned and app-created dashboards alike — if a name in
dashboards:collides with an existing dashboard on the same branch, sync fails with an error naming the conflict, so pick a different name for one of them. - To make a config-owned dashboard editable, duplicate it. There's no in-place conversion — see Duplicating a dashboard below.
The dashboard's details panel shows a Metrics source row (Config file or UI built) so you can always tell which path created it.
Filtering a dashboard by metadata
Besides the day range, a dashboard can be narrowed further with metadata filters — one or more fields, each matched against one or more values. Values within a field are OR'd together; different fields are AND'd. This applies on top of the day range, to every chart on the dashboard.
In the app, use the Filter by metadata control next to the date range picker. Pick a field, then add the value(s) to match:
- A fixed set of flat metadata columns:
build_name,build_version,experience_name,test_suite_name,test_suite_revision,system_name,workflow_name, andjob_conflated_status(labeled Job status in the app — its ownjob_status/job_metrics_statussplit is a backend implementation detail, so only the combined status is filterable).branch_nameand the*_idcolumns aren't offered, since a dashboard is already scoped to one branch and IDs aren't something you'd type in by hand. - Experience tags — matches if the job's experience has any of the selected tags.
- Any project custom field of type
TEXT— matches if the job has that custom field set to one of the selected values.
For the flat fields, type the value(s) to match rather than picking from a list — the app doesn't (yet) suggest existing values for these.
For a config-driven dashboard, declare the same filters under metadata_filters:
dashboards:
  Branch Health:
    metrics_set: Branch Health
    day_range: 90
    metadata_filters:
      - field: workflow_name
        values: [nightly]
      - field: job_conflated_status
        values: [PASSED]
      - field: customfield:region
        values: [us-west, us-east]
Each entry needs a field and at least one value under values. Custom fields use a customfield:<name> field name; experience tags use field: experience_tag_names. job_conflated_status accepts PASSED, WARNING, BLOCKER, or ERROR — the same values stored in the metadata schema; the other raw states (QUEUED, RUNNING, CANCELLED) are transient and aren't filterable this way.
Duplicating a dashboard
Any dashboard, however it was created, can be duplicated from its menu. Duplicating always creates a new, independent, editable dashboard on the same branch, seeded from the same metrics set, date range, metadata filters, and refresh mode as the original — the original itself is left untouched. The copy is auto-named "<name> (copy)" (or (copy 2), (copy 3), … if that name's taken), since dashboard names must be unique per branch.
- On a webapp-built or CLI-created dashboard, the menu item reads Duplicate dashboard — a quick way to branch off a variation without touching the original.
- On a config-owned dashboard, the menu item reads Duplicate as UI dashboard — since the original is read-only, this is the supported way to get an editable copy to iterate on freely. The config-owned original keeps being managed by
dashboards:as usual.
An example dashboard metric
Here's a metric you can drop into your config to get started. It plots daily pass rate over time using only the metadata topic — no emitted data required:
metrics:
  Daily Pass Rate:
    type: dashboard
    description: Percentage of jobs that passed, grouped by day.
    query_string: |
      SELECT
        'Pass Rate' AS group_name,
        date_trunc('day', time) AS "Day",
        100.0 * count_if(job_conflated_status = 'PASSED') / count(*) AS "Pass Rate (%)"
      FROM metadata
      GROUP BY date_trunc('day', time)
      ORDER BY date_trunc('day', time)
    template_type: system
    template: line

metrics sets:
  Branch Health:
    metrics:
      - Daily Pass Rate
A few things to note:
- Dashboard metrics use
type: dashboard. - The query runs against every job on the branch that falls within the dashboard's day range — the dashboard takes care of windowing.
- Grouping by
date_trunc('day', time)produces one point per day. Switch to'hour'or'week'to change granularity.